Showing posts with label tutorial. Show all posts

Jan 31, 2014

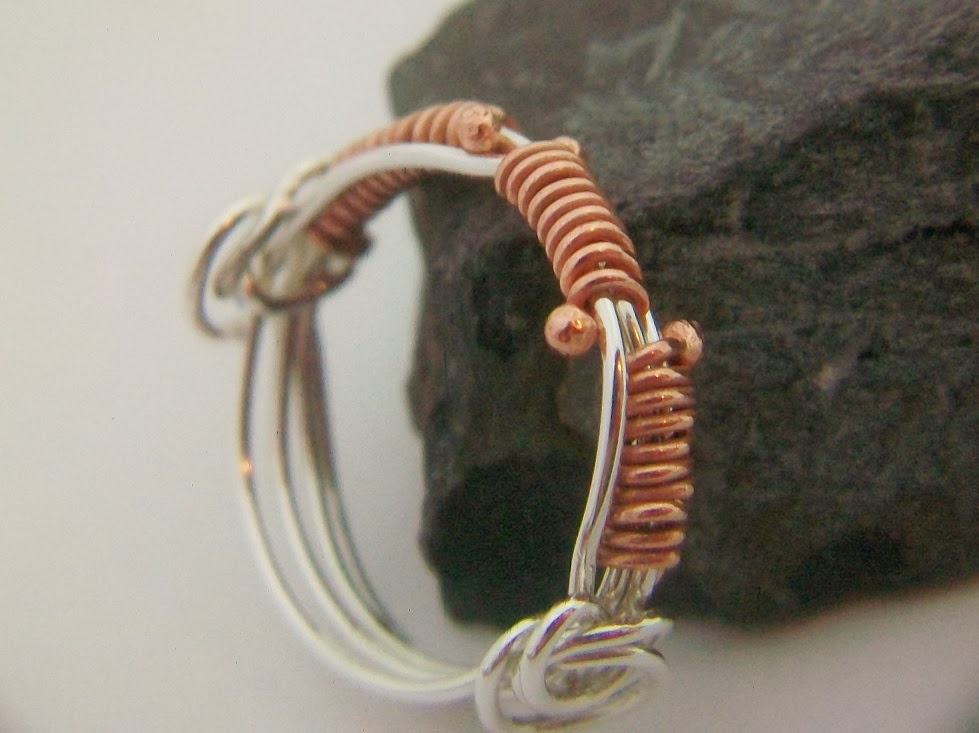
Tutorial Copper Ball Love Knot Friendship Ring

https://www.etsy.com/listing/83350862/tutorial-pdf-wire-wrapping-copper-ball
Copper Ball Love Knot Ring by York Avenue Studio
New Tutorial for wire wrapping a Copper Ball Love Knot Ring! 

This tutorial includes a list of materials, tools and instructions for you to create your own ring. The skills required are basic wrapping skills as well as some general metalworking skills. I have included close-up photos throughout the process.
Instant Download - Visit my Etsy shop here:

https://www.etsy.com/listing/83350862/tutorial-pdf-wire-wrapping-copper-ball

Each side of the ring is adorned with a lovely knot. This is my original design with signature copper ball accents. This ring has a stylish Steampunk look and makes a wonderful Friendship ring or Promise ring.
Wire Wrapped Copper Ring by York Avenue Studio

Feb 24, 2012

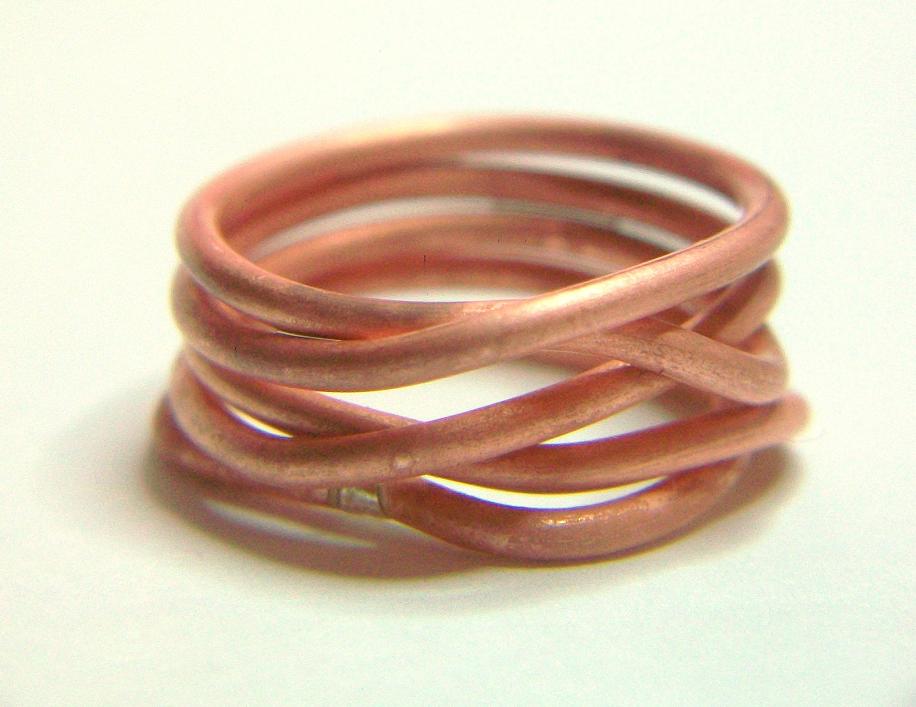
Bold Copper Weave Stack Ring Tutorial How To

Copper Weave Stack Ring by York Avenue Studio
This statement ring looks like woven rings of bold copper and has an impressive wide band.  Comfortable for ladies as well as gents, this ring is easy to make with a few tools and basic metal skills.  I decided to share my steps in making this ring.  Feel free to make one for yourself.

I start with about 12 inches of copper wire, round 14 gauge.  Flush cut the ends and sand flat.  Place the wire centered on a ring mandrel at the size you want your ring, maybe a little smaller.  The ring will get larger with hammering at the end and you can size it right then.  I’m making this ring a size 8, so I use the size 7 on the mandrel.
I wrap both sections, right and left, around the back of the mandrel, crossing in the middle and stop.  Flip the mandrel so the cross section is facing me, this is now the front.
The wire that is at the bottom that crosses up over the top wire, this will be the first wire to work with.  Continue with this wire around the mandrel along the top edge of the wire back to the front, stopping before reaching the front center. 
I bring the second wire up to cross under the top wire.  The wires will only cross in the front and line up in rows in the back.  The cross overs in the front will alternate.  Continue until you use up the wire, watching for the last completed row where the ends will still meet.  Trim the ends to meet, preferably in the back of the ring.
Using pliers, line up the ends to touch and solder the joint.  I left the solder joint silver, but copper color solder can also be used.  Using a patina or pickle that is contaminated also will “plate” the joint more like copper color.
Return the ring to the mandrel and reform the bands with a rawhide mallet, shape the ring, line up the bands.

If the size is too small, hammer it larger. I use a steel hammer to make a hammered texture with facets.
Tumble with shot to polish and work harden the ring.  Patina to darken or keep it shiny.  Protect the finish with Ren Wax which also weatherproofs the ring.
The final ring has such smooth lines, nice texture and the pattern is nice for a subtle chic everyday ring.

If you make one, let me know, I'd love to see your photos, too!
Kathy

For another amazing copper ring tutorial, please visit my Etsy shop for the instant download PDF to make a Copper Ball Love Knot Friendship Ring by York Avenue Studio

https://www.etsy.com/listing/83350862/tutorial-pdf-wire-wrapping-copper-ball?ref=shop_home_active_14


May 1, 2011

Origami Cat Tutorial - Snoozing Kitty by York Avenue Studio

This is an exciting post because I was very fortunate to try my hand at Origami using Paper PMC.  Paper PMC (Precious Metal Clay)  is the paper form of silver metal clay and has unique properties much different than the lump clay version of PMC.  After firing, the creation is 99.9% pure silver!  Here is my adventure:


Paper PMC - Origami Cat shown in practice paper

Cool Tools was having a Free Shipping sale, so I took advantage and ordered some Paper PMC.  I took this as an opportunity to try the paper version, because I only have so much room in my jewelry budget to explore.  Free Shipping, plus the notice that the prices were going up up up soon, prompted me to take a “Now or Never” leap of faith.


Sara Jayne Cole's Book on Origami Jewelry
Back in February, I won a Giveaway on Craftgossip.com for a book on Origami jewelry by Sara Jayne Cole.  Click here to see that post with links.  Since receiving the book, I have been wishing I could try the Origami.  Sara’s book is so wonderfully illustrated, great close ups, step by step projects, tips on finishing, patinas, etc. 
While I was waiting for my new Paper PMC order to arrive, I started practicing Origami with printer paper.  I Google searched for patterns and decided on the Origami Cat by Master Artist and Author, Tomoko Fuse. I was able to repeat the cat over and over on smaller and smaller pieces of paper, eventually getting used to the 6cm x 6cm size.  That is pretty small and that is the size of the sheet of PMC.  It’s about the length of your finger from tip just past the second knuckle.

Once the order arrived, I did a few more practice runs and almost gave up when my wonderful man told me flatly, “You’re gonna waste silver on a dog?”  Well, yes, I stuck to my original plan to make the cat because I could “feel” that the project would be just what I wanted!  A dog??? Seriously?!!

Tutorial for Origami Cat in Silver with Paper PMC

Silver Snoozing Tiny Kitty - Origami Cat by York Avenue Studio
Since the sheet of PMC doesn’t dry out once the package is opened, I took the opportunity to stop and take photos along the way.  I LOVE working with this type of metal clay!  There are so many differences compared to lump metal clay, all of them very exciting!

This tutorial may not be so user friendly if you are new to Origami, so here is the video for more details.

Step 1:  Open the package!
The sheet feels cold and weighty, just like rolled out lump metal clay.  It isn’t sticky, so I didn’t rub olive oil on my hands and tools.  It doesn’t stick to itself, so each fold is easily re-lifted as needed.  The sheet feels floppy, like thin polymer clay, but doesn’t stretch out of shape or smish.  The clay feels smooth and soft and it doesn’t dry out, so no rushing thru a project.  It also has no need for dry time, so once your done with the forming, it’s ready to fire!  This paper PMC is so much fun!

Step 2:  Start with a frog base.

The sheet is folded from one corner to the opposite corner, creased, then opened back up.  This gives you a nice line down the center in diagonal.  Bring one corner to that middle crease, line up the edge and crease.  Repeat on the opposite side.  This will give you a nice point.


Unfold back to flat and turn the paper 180 degrees and repeat using the same two corners, this time the point is on the other end, looks the same.  Unfold.
So far, you have a crease line down the middle, with crease lines on the left and right that make an “X”.

Step 3 - Flaps
Bring one corner up toward the middle crease, folding along the “x” crease till you reach the center, then carefully crease up vertically making the flap to a point.


Repeat on the other side.


Press both flaps down flat to point at the top, crease, then back up to where they were.  Press both flaps down flat to the point at the bottom, crease, keep them there.  Flip the piece over, with the flaps now on the under side of the piece, and turn the piece so the flaps are pointing away from you.  The top “V” layer will be folded next.

Step 4 - Making the Head

Lift the top “V” layer  until it is pointing at the ceiling.  Notice the bottom of that piece is the widest part.  Measure about ¼ inch up from the bottom and place your fingers to grip that spot with both hands on each side.  Keeping your grip, bring that “V” piece towards you until your fingers touch the rest of the piece, then fold away from you at that ¼ inch place, lining up the point with the middle line.  You want to keep the middle crease lined up top to bottom.  This last step will give you a little overlap at the top points of the “V”, with the flaps from step 3 underneath.


Step 5 - Making the Ears

Flip the piece over so the point you just folded is still pointing away from you, but is now the underside.  The short flaps are also pointing away from you.  Take the right flap tip and fold it to your left, lining it’s edge with the fold that goes left to right.  Take the left flap tip and fold it to your right, lining up the edge along the left-right fold.


Step 6 - Making the Body

Look at your piece.  The flap pointing towards you at the bottom is going to be the body/tail.  The flap at the top is going to be the face.  The little flaps folded together will be the ears.  Body, Face, Ears.

Take the tip of the point of the face and bring that flap over the top of the ears to lie flat, with the tip now pointing towards you.  Keep that flap in place, pick up the entire project and fold the entire piece in half along the center (lengthwise), using a Mountain Fold, which means the center comes up from the table and the sides fold down.  As you fold the body in half, stop holding the face flap in place as it will adjust as you fold the body and stand up a bit.  The ears will also adjust as you fold and stand up, too, underneath the face flap.

In the photo, I’ve folded the project in half, then set it down with the body to the left and the face looking right.


Step 7 - Finishes

Holding the entire project, grasp the face flap and gently pull it away from the ears, continue to bend the face until the point is facing down towards the table.  It will open up along the way and flatten out a bit.  The ears will also open up a bit as you do this.  The nose is super long.  Turn the face so it is looking at you.  Fold the nose under to shorten.  Fold again under to shorten more.  Press the face to keep it in place. 

To finish the body, select a point along the back and flatten out the remainder of the body to the tip of the tail.  From the point you’ve selected, reverse the fold to tuck the tail in between the body sides.  The tail will be folded in half and come out the bottom.  The piece of tail sticking out the bottom, fold it up on the front side of the body, then fold another little tip to point to the back.  This makes a little curled tail. 
I pressed the face and ears to face front and curled up the front paws.

I also used a tool to make a hole just behind the ear so I could attach the kitty to a necklace.


Step 8 - Firing the Cat

I set the cat face down on a firebrick and used a butane torch, holding the piece at an orange glow for 5 minutes.


Step 9 - Polish and Patina

I used a wire brush to scratch/burnish the white matte finish off.  Then I sanded with 600 grit, 1200 grit and 2000 grit.

I used Liver of Sulfur gel in warm water with 2 tablespoons of ammonia.  I dipped the piece for a few seconds, then swirled in cold water.  I repeated until I got the colors I liked, then soaked the piece in water with baking soda.

Hand polished with a cloth.


Origami Cat - Silver Snoozing Tiny Kitty by York Avenue Studio
I am super pleased with the patina color which is blue-purple and silky.

The little hole I made behind the ear to attach to a necklace was covered after firing.  The good thing about paper pmc is that it doesn’t fire together but rather each flap is still separate and can be nudged gently apart to tweak the points.  I could easily bend the ear out a bit to uncover the hole I made.

The silver is similar to 26 gauge sheet and flexible if using pliers.  Be careful when using any power tools, like a drill or you will destroy your project before you know it!

Here is a photo showing my practice paper kitty next to my silver kitty!


I would love to hear your comments about my Origami Kitty and also love to see any photos of projects you’ve done with Paper PMC!
Kathy

Apr 8, 2011

New Free Tutorial - Zebra Stripe Copper Post Earrings by York Avenue Studio

New Free Tutorial!  Zebra Stripe Copper Post Earrings by York Avenue Studio


Zebra Stripe Copper Earrings by York Avenue Studio


This tutorial is a follow up to the Tutorial for Zebra Stripe Polymer Clay Cane.  Using the zebra cane slices, you can make these animal print earrings!


Zebra Stripe Copper Post Earrings by York Avenue Studio

Recycled copper circle earrings with bold black and white zebra print, handmade with my own original design. I created a zebra pattern with polymer clay and used slices of a reclaimed copper tube to fashion these gorgeous post stud earrings. Great care was taken to polish the clay to shine like gemstones and the pattern continues through the back of the earrings, which means there is no skin contact with the copper!

The tiny circles are ½ in diameter and the posts are sterling silver with comfort backings. Each earring weighs 1.5 grams, nice lightweight yet solid sturdy design.

I have these for sale in my Etsy Shop, but for those fellow crafters that follow me, here are the steps to make a pair for yourself!

Materials for Zebra Stripe Copper Earrings
The photo above shows what I started with:

1.  Zebra print polymer clay, which you only use 4 slices
2.  Extra clay, junk clay, enough to fill the copper circle
3.  2 copper tube slices - I will tell you how I made mine in a second...
4.  Sterling silver posts and backings
5.  The greatest tool - a toothpick!
6.  Sandpaper - 400grit, 600grit, 1200grit, 2000grit
7.  Dremel rotary tool with polishing wheel

I started by slicing my copper tubing.  I had saved this 6 foot piece when we had a new dishwasher installed, it was the water line and was tossed out to the curb.  I grabbed it for "someday" and stored it.  I used a little handheld pipe cutter from Lowe's working with leather gloves.  I sanded the edges smooth.


The ridges shown on the sides of the copper in the later photos is my inexperience with cutting pipe.  The tool cuts a groove and as the tool is wound around the pipe, I tightened it and went around again, tighten and around, etc. until the pipe is cut through.  My groove was off a bit, well alot and made several grooves, but eventually cut clean though!  I actually like the "stripes" because they match well with the zebra theme!

Next, I rolled the spare clay (brown) into a log that would fit the center of the circle and with the copper circle flat on the table, smashed the clay down to the bottom, leaving spare above the top rim.  I took the sterling silver earring post, mine has a ball and loop, and pressed it into the clay on the bottom until the ball and loop sunk enough and then covered it with clay, using the toothpick as a roller.  Then, I turned the copper ring on the side and sliced the clay on the top rim flush and flat.  The baked clay will hold the post in place.

The zebra slice is then centered over the post and pressed thru and down to rest on the back.  Trim the spare clay to leave a nice circle on the backside.  For the front, the zebra slice is pressed on and trimmed.

I baked mine at 265 degrees for 25 minutes and let cool.

Sand with 400grit, then 600grit, then 1200grit and 2000grit.  Finish up with the dremel tool.


Zebra Stripe Copper Earrings by York Avenue Studio

I really love the contrast of the zebra to the copper metal.  These are so fun to make and done in no time.  I hope you enjoy the tutorial and spread the word to family and friends who enjoy handmade jewelry.


Kathy


Mar 11, 2011

Do It Yourself Tutorial for Feather Hair Extensions

Super hot fashion trend!  Feather Hair Extensions add color and pizzazz to any hair type or style!  The link below will take you to the tutorial on how to get this look yourself, the materials needed, and where to shop! 

What amazes me is that you can add these gorgeous feathers to your hair, then wash and style your hair and keep the feathers looking fresh!


She’s Crafty: Feather Hair Extensions

Mar 10, 2011

Zebra Cube Charm Necklace by York Avenue Studio

Zebra Cube Charm Necklace by York Avenue Studio

My recent post for the Free Tutorial for Zebra Stripe Cane in Polymer Clay has been getting some nice traffic!  Hope everyone is enjoying their Zebra designs and I would love to see some photos!

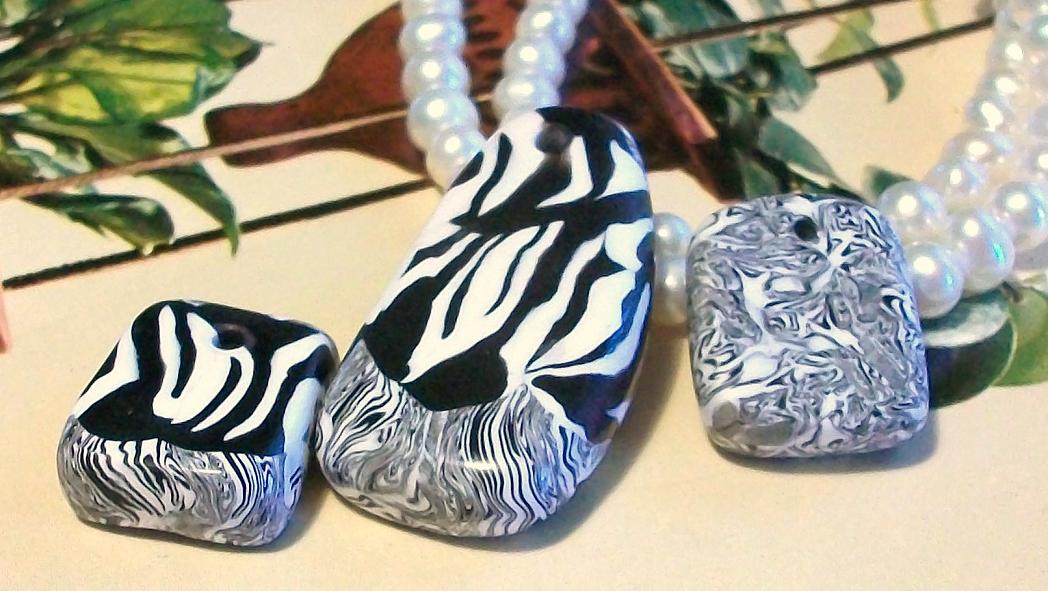
I used one of my Zebra beads to make a necklace with tiny gray pearl flowers.  I used Liver of Sulphur Patina Gel from Cooltools.com to give the silver a nice antique/rainbow finish.  I still can't get over how smooth and shiny polymer is after sanding and polishing!  Feels great!


Zebra Cube Charm Necklace by York Avenue Studio - Back


Kathy

P.S.  Welcome to Missy Polyclay!

Feb 28, 2011

Free Tutorial - Zebra Cane in Polymer Clay by York Avenue Studio

Zebra Cane Beads by York Avenue Studio


I find it amazing that something so gorgeous and in demand, like a Zebra Cane Tutorial, is very hard to find on the internet!!  There are some zebra canes pre-made for sale, beads for sale made from canes, and for a fee, you might find access to a tutorial, maybe.

I started to think that maybe there is a conspiracy amidst the polymer-clay-ers not to share the zebra without membership.  Hmm.  I am new to polymer clay and must be over-thinking this....

Well, I'm going to post a Free Tutorial for a Zebra Cane in Polymer Clay, no coupon code needed, no membership fee or registration!

After having so much fun making my first cane ever recently, I decided I wanted to try a Zebra Cane.  Since there wasn't a free tutorial to be found, I delved in and made one up!  Maybe it was beginner's luck?  It worked!

I hope you enjoy this tutorial and have great success making Zebra Canes in polymer clay!

By the way, if you happen to find another tutorial for Zebra Canes that is free online, leave a comment!  I'm still thinking there must be a "silence pact" so we newbies have to pay to join in!  Actually, I've found the polymer clay community very friendly and warm, so please don't pay any mind to my suspicions.

Simple Zebra Cane Tutorial for Polymer Clay by York Avenue Studio

With the Zebra Cane, you will be stacking layers that are equal in length with different widths.  The overall width of the stack will determine how long your stripes will be.  I made a simple, easy Zebra but you can make an elaborate Super Zebra with these basics, then add your own creativity.

Simply stacking layers of alternating black and white will give you a bar code stripe, not very much like a Zebra, but a nice general start.  This is what I had in mind when making this cane.  I kept it simple with some variations.

1.  Condition some white and black polymer clay and divide into lumps.  I use Premo brand and knead the clay in my fingers.  I am only making a small cane so I used a small amount of clay.  Divide an almost equal amount of each color into lumps, as each black lump will be a stripe and each white lump will be a stripe.  Make several, depending on your style preference.  I like bigger black stripes, you might like thinner black and larger white, etc.


2.  I start out with one black lump and roll a log.  The length will be the cane length.  Then flatten the log, not perfect, as stripes tend to be wider then thinner.  The flattened piece is the length and width of your cane.  If you want it longer or wider, adjust now.  I made a short, skinny cane because I was testing the method.  I've learned that once you make a great cane, you wish it was bigger!  This one was great but ran out fast!

In the photo below, I've made the first flattened black piece.  I've also started a second black piece, which brings us to the next step.


3.  Make a second black log about the same size as the first and flatten.  Try to make them at least the same length.  I ended up trimming mine to match.  Lift the second piece and place it on the first, lined up length wise with the first piece, but off center about 1/3 of the width.  Some of the strip will overhang on one side. Don't press yet.

4.  Make a white log the same length as the black strips and flatten.  Lift the top black layer holding the edge hanging over, leaving the other edge attached to the first layer.  (It will look like an upside down capital T.)  Take the white layer and line it up length wise with the black layers on the side you are lifting.  The white layer goes on top of the first black layer.  When the top black layer is placed back down, it should cover the white layer.  Any clay that hangs over can be trimmed off and used later.


First black layer with second black layer lifted up, like upside down T


White layer gets tucked beneath the two black layers
5.  Another white layer goes across the top, full length and width of stack.

6.  Another black layer goes across the top, full length and width of stack.

7.  I added a black layer on top of the last black layer and tucked another white layer between, just like steps 3 & 4.

Once you are finished layering your stripes, then trim the extras on all four sides and shape the stacked sides nice and flat, working the layers gently so they are pressed together.

Time to slice and see your creation!

I used the extras and lined them up length wise and rolled them into a log, folded the log length wise and rolled again into a log.  This junk cane actually turned into a nice coordinating mini zebra pattern that I used to fill in spots on my beads.  It almost looks like a Toile pattern on the back.

To make my beads, I used some junk clay as a core and used slices from my Zebra cane to cover the outside.  I positioned the slices just so which helped the pattern appear to continue on.  I used my fingers to work the slices together and a round toothpick as a mini roller to smooth the seams.


Zebra Cane Beads by York Avenue Studio


Zebra Cube Charm Necklace by York Avenue Studio - Front
Zebra Cube Charm Necklace by York Avenue Studio - Back
Zebra Stripe Copper Post Earrings by York Avenue Studio


Kathy

Feb 23, 2011

Artist Spotlight and Tutorial "Cat in the City"

Cat in the City by Katja of Mainartwork

This tutorial is written in Russian, but I was able to use Google to translate the page.  I adore this bracelet and the beautiful photos by artist Katja of MAINARTWORK (user name: be_main).  First, the link to the tutorial:  http://community.livejournal.com/polymerclayfimo/3463010.html

Second, another page written by Katja with more of her art designs in polymer clay, as well as fabric clutches, paintings and more!
http://be-main.livejournal.com/

Enjoy the links and let her know your comments!